Before setting out on a planned multi-month trip (the multi-month part was planned, nothing else was) on my scooter, I wanted to upgrade the rear lights a bit. One of my main worries with touring on the BV350 is its limited range, something I’d been augmenting by carrying a couple of fuel bottles bolted to the underside of the top case. Unfortunately this tended to cover the rear lights a bit.
This is a quick post to highlight how my father and I connected up an Admore light bar to my 2016 Piaggio BV350 scooter.
These notes are from my experience mounting the bar. I am in no sense any kind of expert, this is the first time I’ve done anything like this. As I’m writing this I’ve put a couple of thousand miles on the bike since mounting the bar, and it’s working great. It’s super bright and makes me feel much more confident about being seen from behind. I’m noting the wire colors I tapped in to, no guarantees yours will be the same, etc.
All photos can be clicked on to see a higher resolution version.
- The first thing you should figure out before digging into this is where you want to mount the bar. I have a giant top case and decided to mount the bar on the plate that holds the top case. I did some testing first and mounted the brace so that the is low enough I don’t hit it while removing the top case from the bike.
- Once you’ve figured that out, you’re going to need to scheme where to tap into the electrical lines. I had no idea, so we ended up taking off a fair amount of fairing. That being said, we ended up having access to all the wires through one of the holes under the seat. If you’re sitting on the handlebars looking under the seat, it’s the one in the back-left (right-hand side when you’re riding). You’re going to need to open two wrapped “sets” of wires, and they’re pretty tightly pulled, so working through that tiny hole is going to be hard if not impossible.
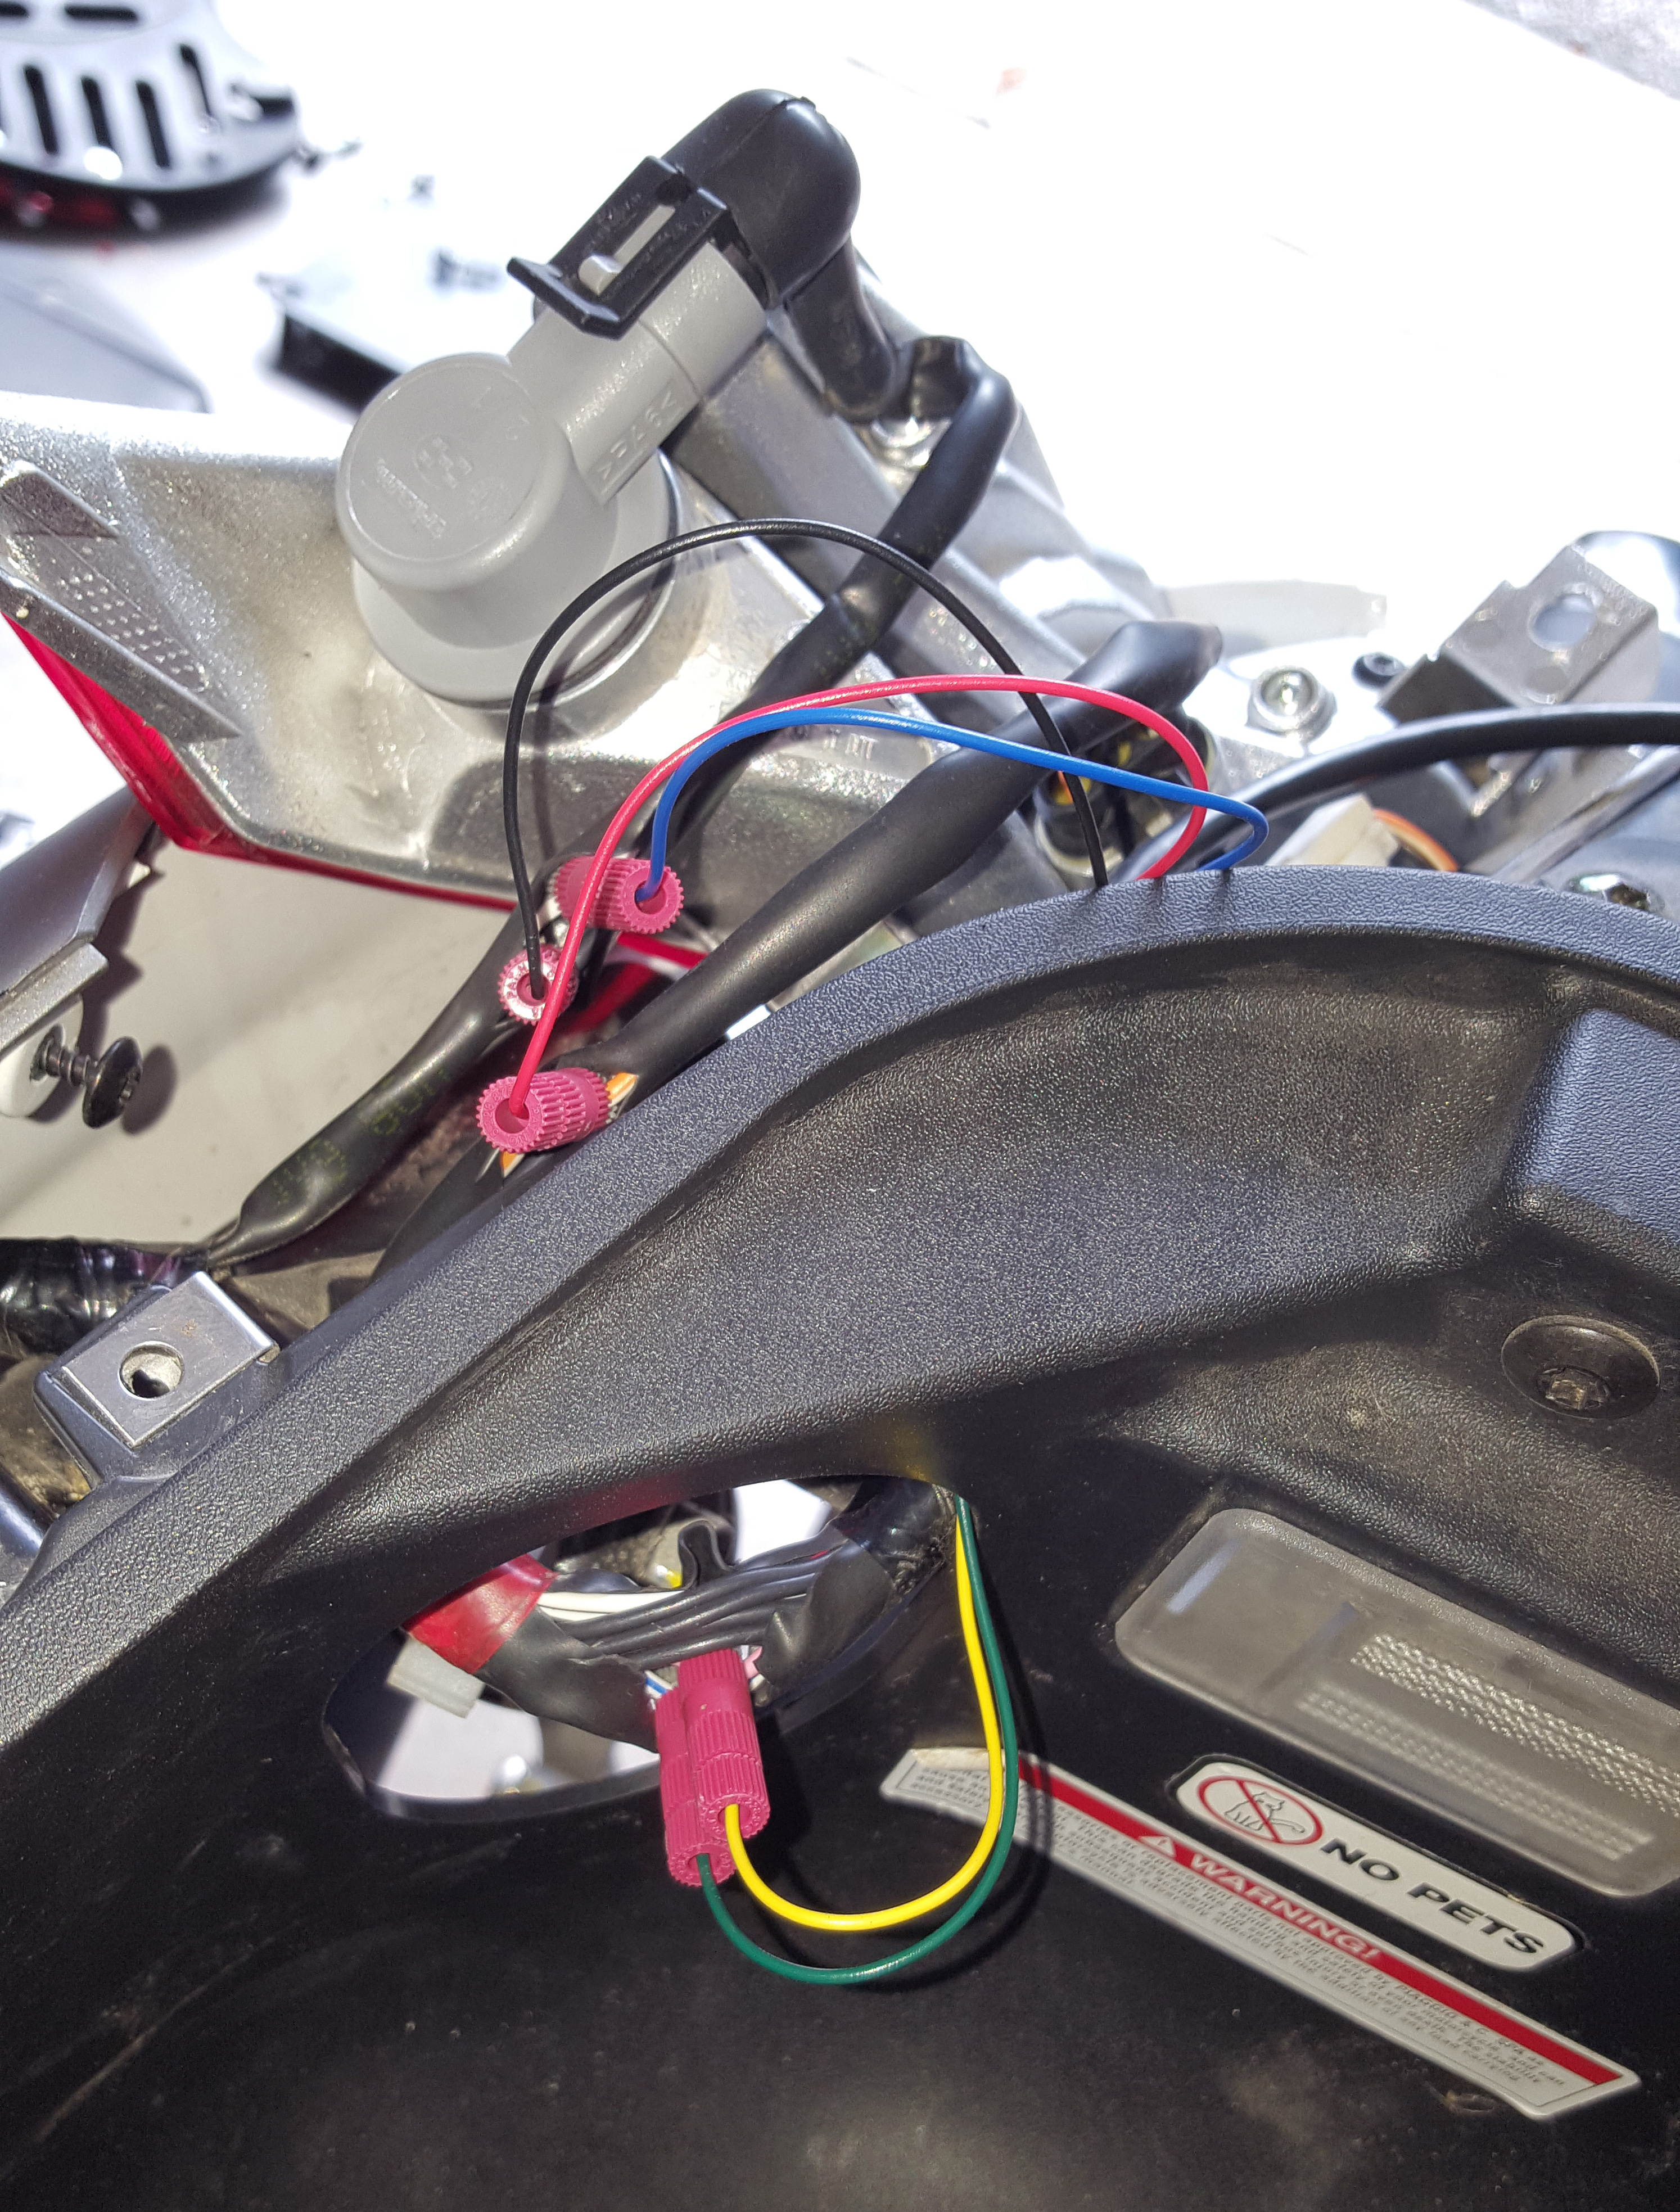
Where we tapped into the wires to hook up the light bar.
- At this point also think about how you’re going to run the wire from the light bar to wherever you’re going to tap in. This may determine what, if any, fairing you’ll be removing. We ended up running it under the running lights but over the mud-flap, and following the tail light wires in.
- You might want to pull the fuse for the automatic under-the-seat light. We knew we’d be spending a few hours bungling about, so pulled the fuse that way we wouldn’t run down the battery. That ended up being the bottom-left fuse (fuses are under the toolbox under the seat (on top of the battery), picture taken facing the fuses from the rear of the bike facing forward).

What I was reading in the manual was very different than what worked, to disable the under-seat light remove the bottom-left fuse.
- I’m not going to post directions for removing all the bits and bops of the fairing. It’s pretty straightforward, just keep track of what screws go where because there are a bunch of different sizes and configurations. If you’re facing the front of the bike from the rear, you can probably just remove the fairing on the right-hand side. You just need the stuff near the back, but you’ll loosen up most of the right-hand side to get there. The wires on my bike come together and run from the back to the front on the right-hand side, so that’s where we ended up working.
- The wire-taps that Admore ships with are super handy and easy to use. I ended up wrapping them in electrical tape once done just to keep the dust and moisture out, but they really do make this whole job a ton easier. No splicing needed!
- The only part of this post that might be useful: what wires do what. At least on my bike, no idea if it’ll be the same on yours.
- If you’re looking through the hole under the seat I described you can see one bunch of wires very close to you. This has the turn signals in it, and you could also tap into the ground here. It’s a big, thick pile of wires so was much harder for me to work with than the other one, so I took the ground from the bundle of wires farther back. Note there’s a clip you can undo to get a lot more wiggle room, it fastens the bundle of wires to the frame. You do need to (carefully!) cut through the wrapping tape around the bundles to get to the individual wires.
- The second bundle of wires is farther back but is smaller and much easier to work with. I’d be impressed if you can get to it through the hole in under the seat but that’ll save you a bunch of fairing removal if you can manage.
- Wire functions and colors (first two are in closest bundle, second two are in farthest bundle, ground is in both):
Function BV350 Wire Admore Wire Right Rear Turn Signal Blue & White Green Left Rear Turn Signal Pink Yellow Brake Light Black & White Blue Tail/Running Light Orange & White Red Ground Black Black
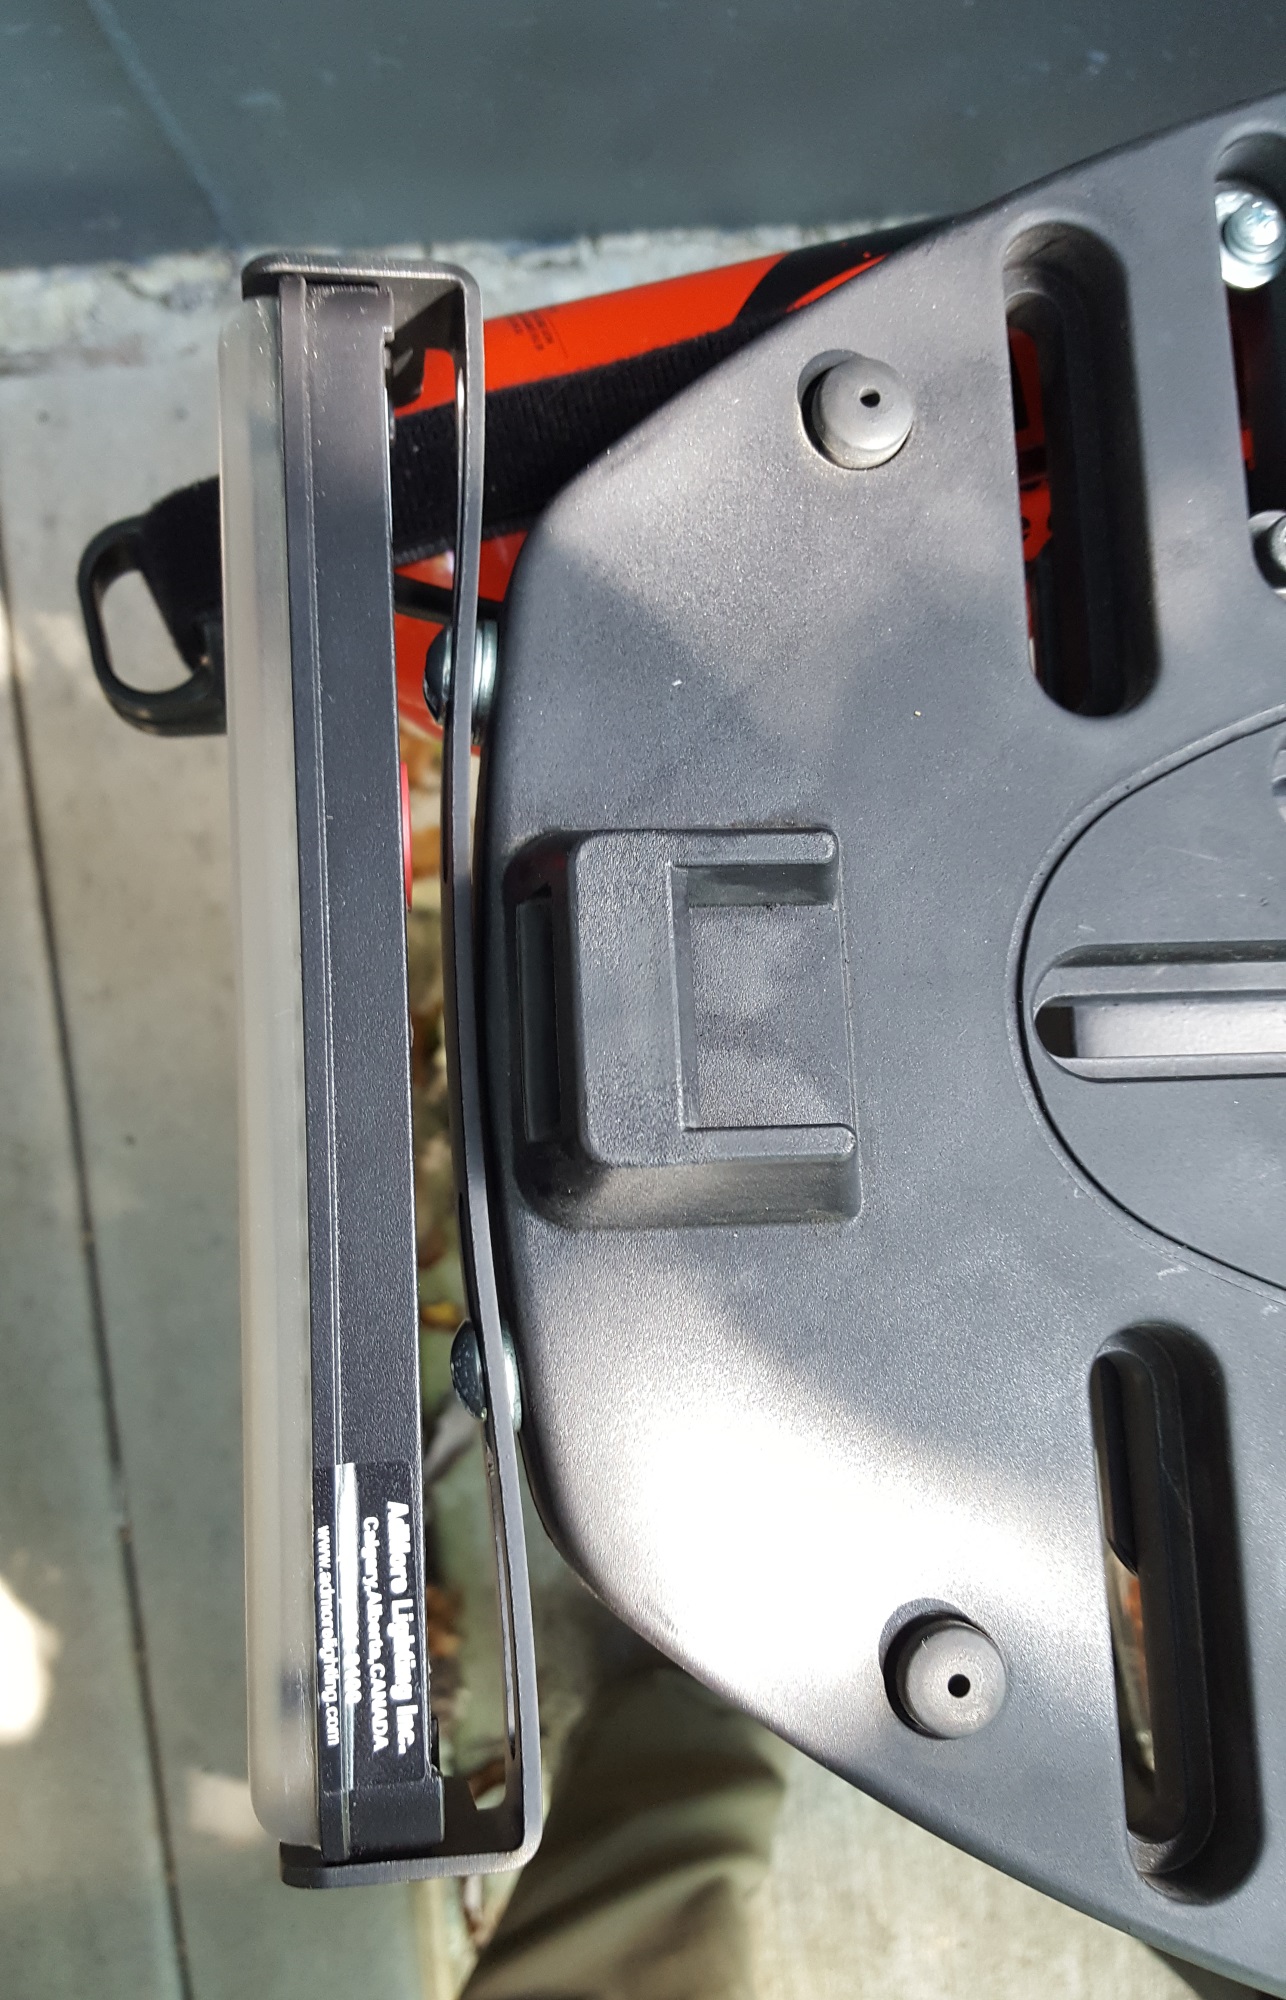
- The top case plate we attached the light bar to is curved, so even adding some washers the mounting bracket had to bend a bit. This seems to have worked out fine.

Mounting bracket curving to fit on top case plate.
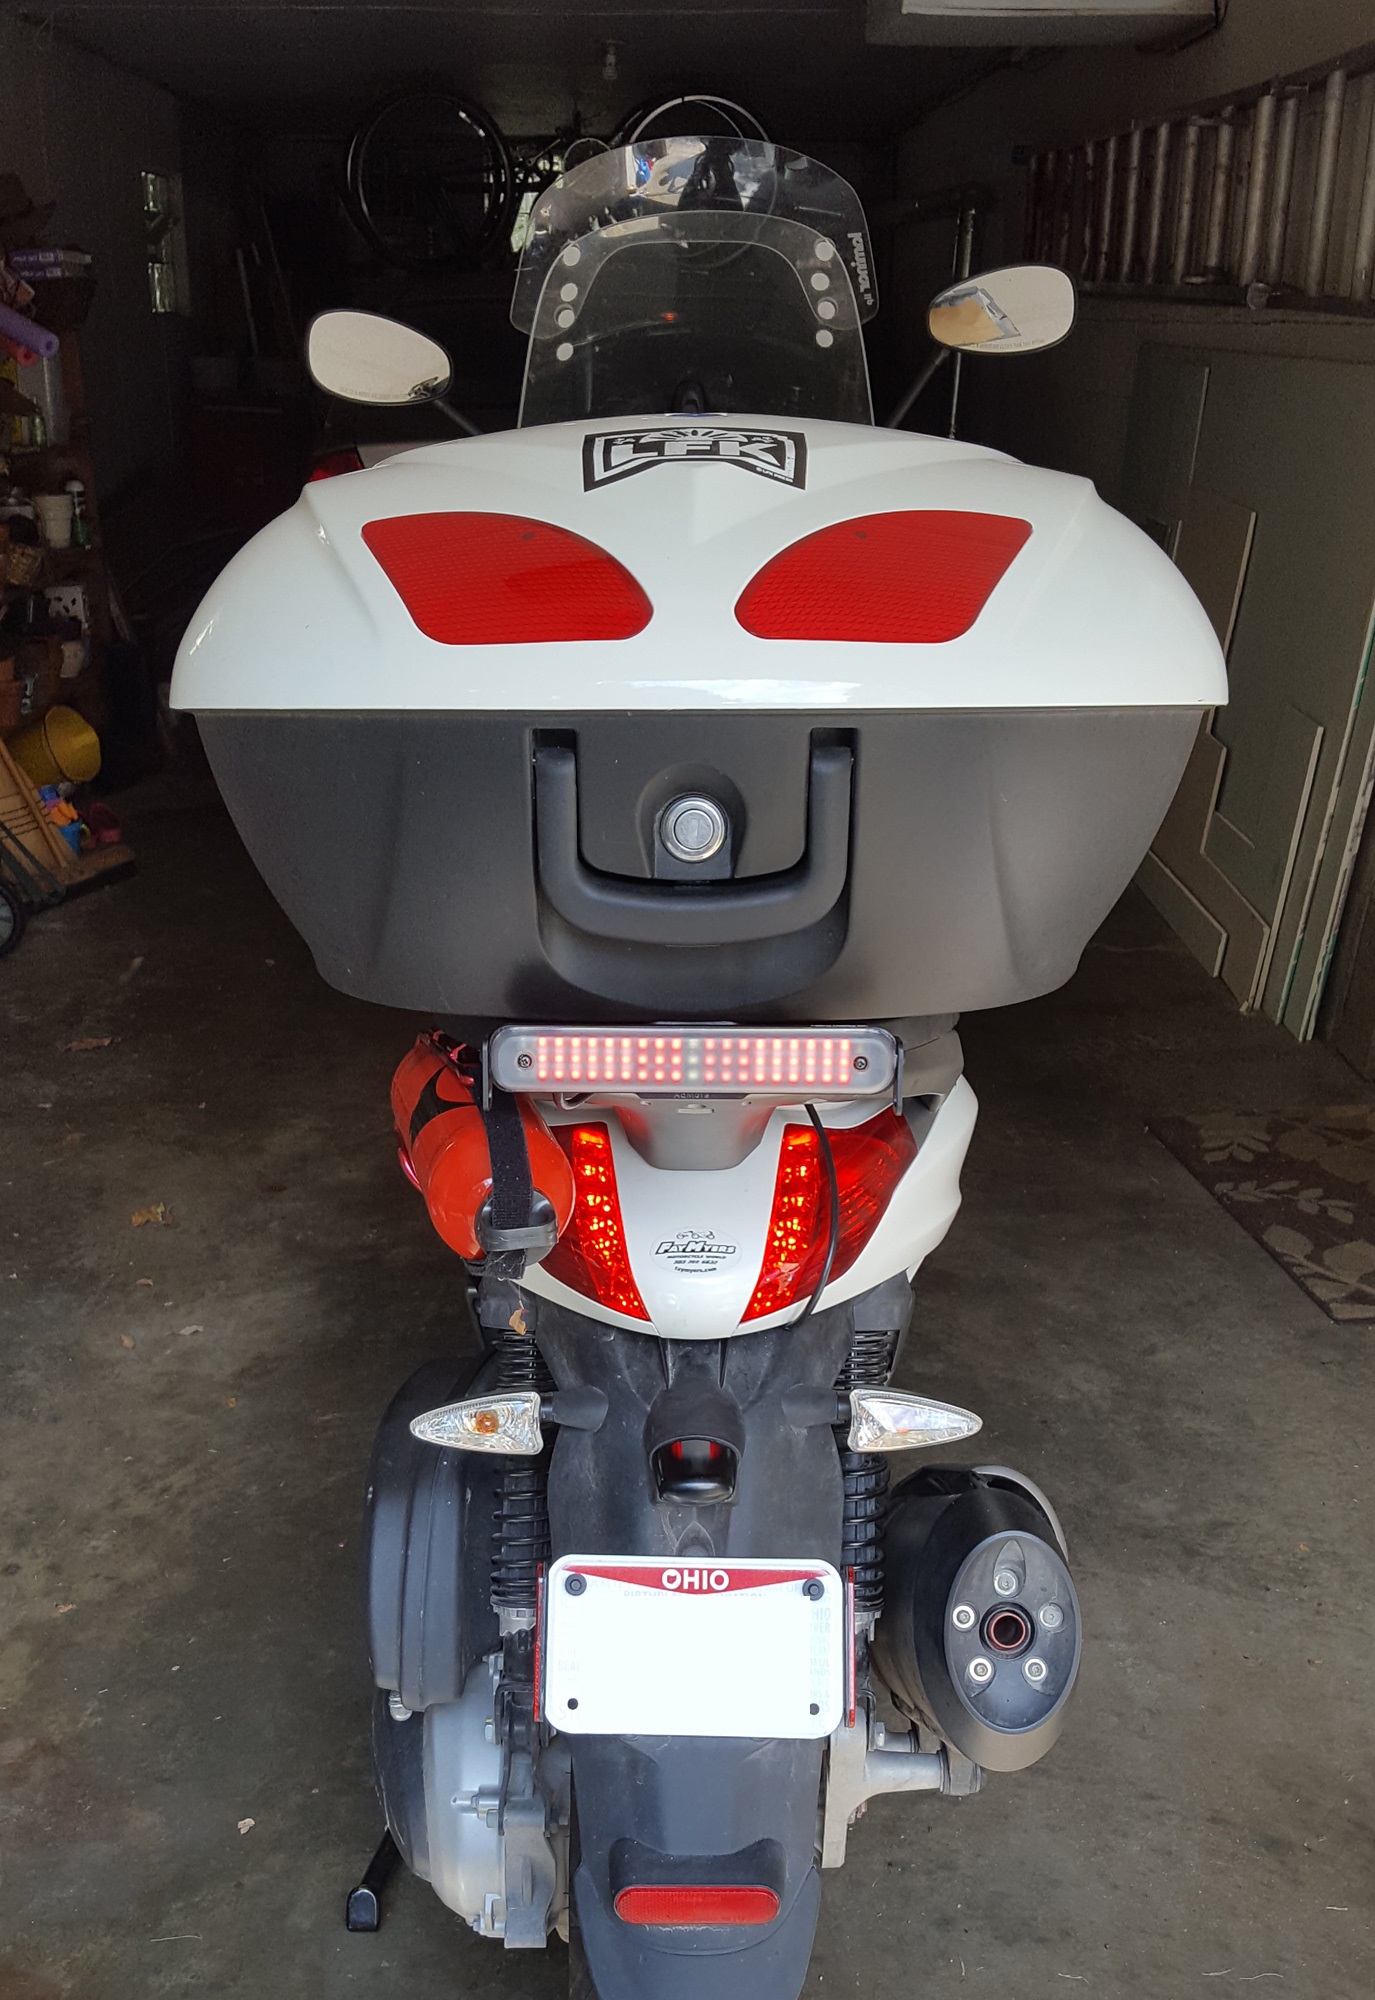
- Final product! Not a great photo but you can see where we mounted it and ran the wire. Also how one fuel bottle covers the brake light a bit. So far I’ve ridden over 2,000 miles over 11 states on everything from gravel roads to 80mph highways and it’s still working great.

My BV350 with Admore Light Bar mounted.